Showing posts with label Design. Show all posts

Thursday, February 21, 2013

Etsy Shop


So, since deciding on pursuing art as a major part of my life, one of my goals has been to open up an Etsy shop to sell original drawings and prints. Of course I still have many other things to do to prepare for the opening, but one thing which has been plaguing me is finally complete!
 
I finally settled on a concept for my etsy shop banner!
 
Well, at least for now lol.
 
I still want to play around with it of course, but I am happy with using this as a base to jump off from. I also now have something to base my business cards, thank you notes, and packaging designs off of.
 
The idea really originated from my love of topiaries! I wanted to use them in the same way many home and shop owners display them on each side of their entrances. I love the charm and welcome they always seem to convey. And its so English! Unfortunately with the dimension limitations set by Etsy, I wasn't able to design something incorporating them that I loved.
 
Solution? Lamp posts!  Don't ask why lol.
 
{Lantern #1}                     {Lantern #2}
 
I ended up drafting a couple different lanterns, then went into Paint and touched them up and incorporated them into a banner. I had to cut it up a lot in order to keep the size right, so afterward drew up a new lamp that fit the proportions much better.
 
Final result!
 
 
Its very simple, but I like it. And I can make it festive for holidays according to my whimsy. 
 
 
One little task officially complete!


Friday, December 28, 2012

Holiday Home Tour 2012


This year's decorating was very modest, with just a few touches to get in the spirit of things.
 
Welcome Welcome!


Simple wreath I decorated with left over ornaments, nothing fancy...


My tree!
I definitely want a fat white tree for next year.
I think those are so beautiful.
This one is also pretty skinny lol.


Festive minibar! Definitely a necessity for the holidays.


Advent calender for 2012.
These are always a bit more fun with more people involved though.
Somehow there just isn't as much suspense or magic
when I placed the chocolates there myself...


My snowflakes I cut out and glittered all by myself! I am very proud of them lol, although I would have liked to hang them up in a different way. There is always next year though. That was a fun project, and so inexpensive! Paper crafting is always a good option lol.


The beginnings of my new paper village! I haven't really glitterfied them yet, and I will add several more little houses as well and white trees. Eventually it will be a cute little paper village! But for now... its just a Texas village lol.
 
I hope everyone had a wonderful Christmas! It actually snowed on Christmas Day here in Dallas!!! I haven't had a white christmas in sooo many years; it was magical. Although I didn't spend it with family, I was invited to my boss' home and we spent the day cooking gumbo, making sugar cookies, and wrapped up the night with a film. All while enjoying some pretty fabulous wine, listening to christmas music, watching the snow fall, and laughing together. Driving home I felt so grateful and appreciative to have been invited to enjoy the holiday with them and invited into their home. That is definitely what Christmas is about.
 

Thursday, December 6, 2012

Homemade Snowflake Ornaments


Since I changed color schemes, I wanted to add a few white and red ornaments to my tree this year. Last year I used simple green ball ornaments from Hobby Lobby and painted snowflakes on them, and I wanted to follow through with that again but with red.


I still had the glitter and white paint I used, so all I had to buy were a couple boxes of ball ornaments for a total of $5.00
 
One christmas movie later, viola!


These additions were definitely needed to bring some pop to my tree! And there is something just fun and festive about making your own ornaments :)


Happy Christmas!!!

Wednesday, December 5, 2012

Christmas Tree Decorating

 
So this year, my new apartment has a completely different color scheme than my old one. Go figure lol. The last two years I have done a white and green christmas (2011 and 2010). Prior to that, I had done the traditional red and gold. This year, my walls are grey and I have turquoise and aqua accents, so the green wouldn't really have worked.
 
So what to do for Christmas?! The easiest thing would have been to go for an all white and silver color scheme. I started decorating my tree with this in mind first.


I am so grateful my tree is prelit lol. They are sooo much easier to put up!
 
Most of my ornaments are just ones purchased from the craft store, but I do have one little box of glass ornaments that mean something special to me. My grandma had these little glass heart ornaments on her christmas tree, and our family inherited them when she died. Every year growing up when we would hang all our ornaments on our tree, coming across these always pulled at my heart a little with memories of her. A few years ago the last one left finally broke (hazards of pet ownership). Apparently my distress was visible, because last Christmas my mom hunted down new ones and gave a whole box to me for my very own!
 
 
I will always cherish hanging these on my tree.
 
So after decorating my tree all white, I was still missing some pops of color, so decided to throw in some Red! It's not as classic, but the little pops of brightness bring me cheer :) I even have little cardinals nesting in the branches!


Thank goodness my tree skirt works! The above picture doesn't really do the red justice, the picture below is a bit more true.


I don't think I will hang stockings this year, since my new apartment does not have a fireplace, and it would just be me and one for Sasha. She has been uber cuddly lately... anytime I am on the couch working on my laptop, sketching, or watching a movie she just plops right next to me hehe.


Tuesday, December 4, 2012

Mad Men Minibar


I stumbled upon this dresser sitting by the dumpster one morning while taking out the trash.


Immediate thought: this could be my mini-bar! I rushed back into my apartment, grabbed my yard stick, measured the wall space in my apartment simply screaming for a minibar, and then went outside and measured the width of the dresser. And I had 2 inches to spare! Obviously I proceeded to drag the thing into my apartment, to await my DIY planning hehe.


Painting required of course... and new hardware. After I painted it over white, I decided to try something new and paint the top two drawer spaces a seafoam green. I think it turned out pretty well, and I really love using the stackable wine rack in the space.


At first I wanted to buy a shelf to install above and then get some stemware holders to nail underneath it so I can hang my wine glasses underneath. But the latter really only come in dimensions of 12" depth, while finding a floating shelf that deep is practically impossible. So I compromised by finding a 6" deep floating shelf and just storing some of my glasses on top.


I am using the drawers for linen storage since I do not have a linen closet.
 
 
When I painted over the top, I had to do several coats because the writing kept creeping through lol.
 
One young teenage girl's trash - my own new household treasure.


Wednesday, October 3, 2012

It's That Time of Year Again!


Time for the Halloween Blog Party with A Fanciful Twist! Last year I did the Practical Magic Blog Party, but this time I am going with another venue closer to All Hallow's Eve.
 
More pumpkins and glitter this year hehe.


Everyone is posting on Saturday, October 27th this year, and there will be a link from my post to all the other bloggers so you can hop about all morning getting inspiration for Halloween! Should be loads of fun!


Friday, September 21, 2012

Thrift Store Finds: Coffee Table

 
I finally found an acceptable coffee table!!!

In my mind, the perfect find would have been this table from Pottery Barn. Buuuut I think the $500 price tag is just a bit steep, eh?


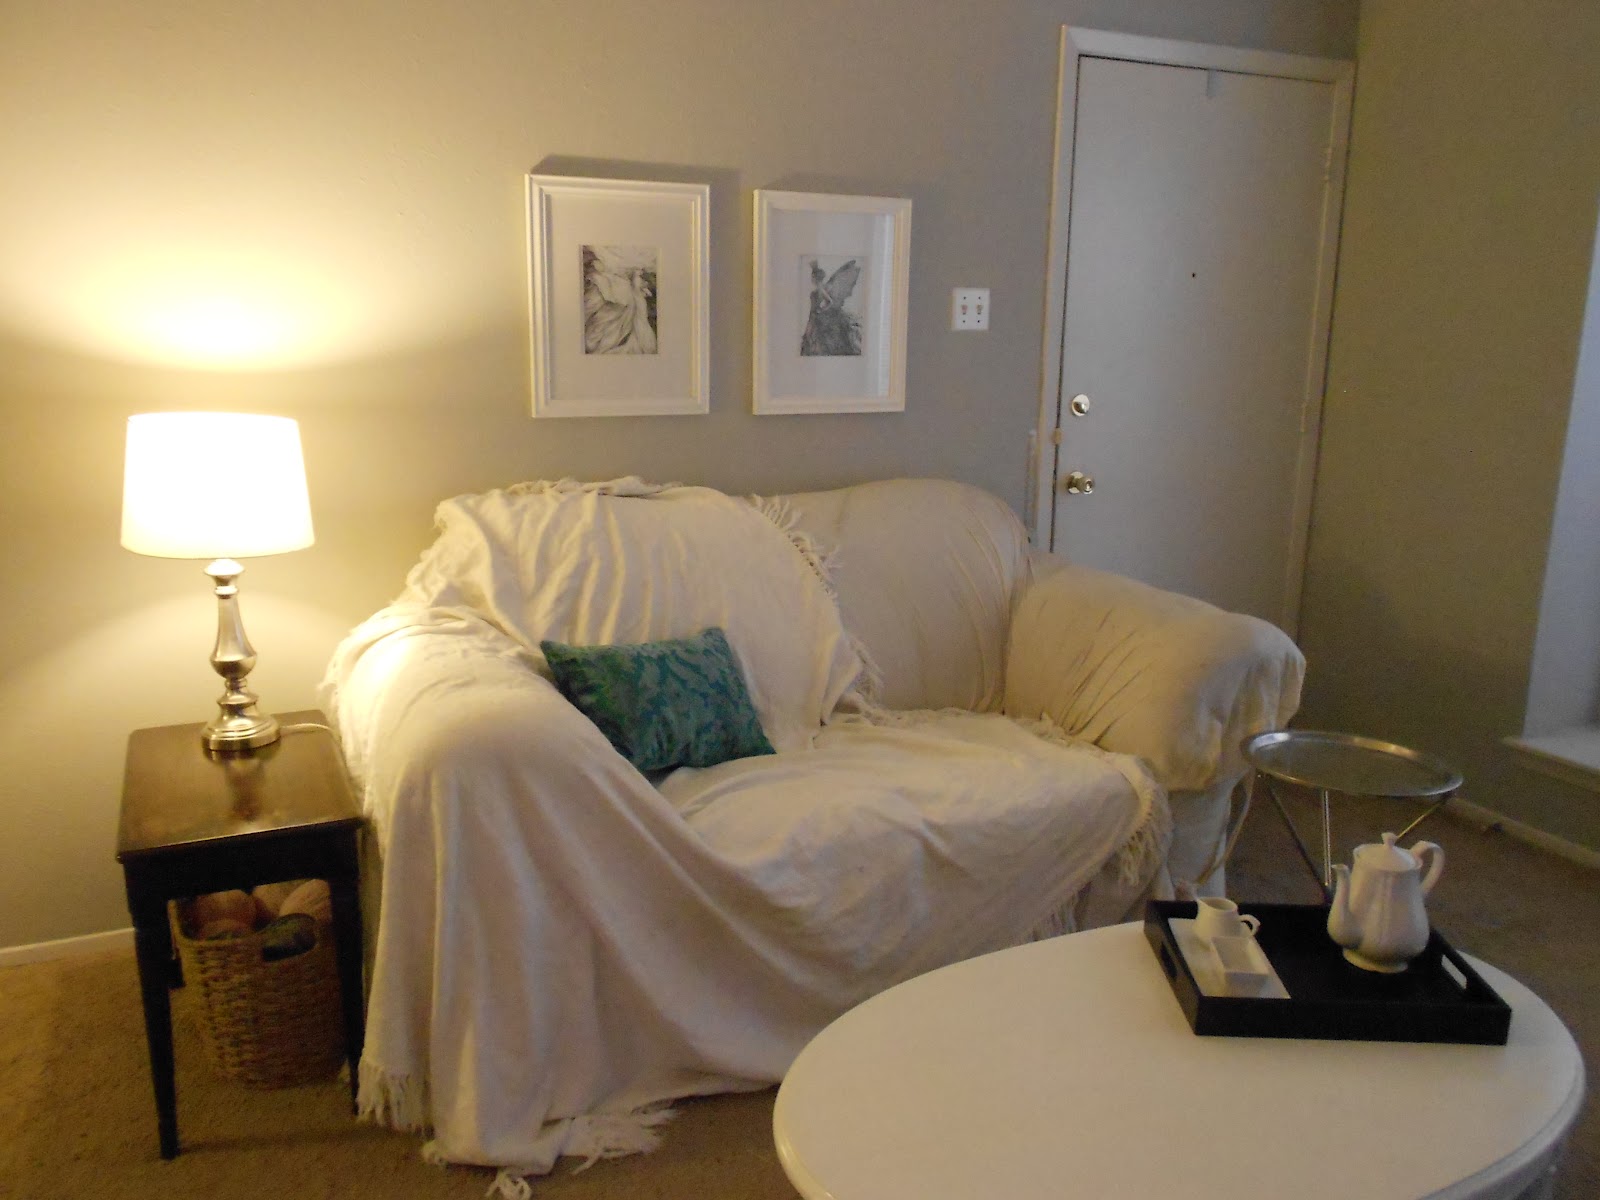
I have an off-white slip cover for my loveseat that I was planning on combining with a dark wood coffee table just like the above. I also love the storage beneath (I need somewhere to put my card games, books, and current knitting projects!). Since I often end up eating my meals on my couch (I am single; I get to do that lol), this would have been perfect for me.
 
 
But alas, I am not rolling in the dough... hence requiring another trip to CCA. I found this coffee table for $15, and it was sort of a light walnut color with nicks and dings and such. I thought about staining it dark as well, but because of the rattan shelf I chose to go with white paint instead.
 
Supplies:
 
1. Coffee table- $15
2. White paint and sponge brush- already had
3. Polyurethane sealant and bristle brush- already had
 
I painted several coats of paint (since I had to cover a darker wood color) and that took a day. Then I coated this with 3 layers of poly the next day and let dry for 24 hours.


The reason I chose this was because the style fits with my living room, the size is perfect, and the shelf provides storage space I need for knitting projects, books, and such.


Very content!

The holidays are going to be so much fun lol...

Monday, September 17, 2012

Thrift Store Finds: End table


Piano bench made end table! Oooo! Aaaaah! hehehe.

Picked up this little guy at a thrift store for $10, and spruced it up a bit to fit with my little living room. This was my first sanding/staining experience, and boy was it interesting. I borrowed an electric sander, but was surprised by the strength needed to really get the layers of stain off! Whew my arms were tired lol.


Supplies:

1. Bench- $10
2. Electric sander- borrowed
3. Stain + brush- $7
4. Polyurethane sealer + brush- already had

I used a dark walnut stain to get the espresso look like my bookcases, and then applied 3 coats of polyurethane sealer. The sanding took me a couple of days just because I was tired, and then another 2 evenings for the staining and sealing.


Et viola! I absolutely love it! I am so glad I did not give in and paint it while like some of my other pieces. Since my couch will have the white slipcover (soon to be made), I really needed a darker piece in this area.


Thursday, August 30, 2012

Kitchen Dreams

 
 {kitchen as of this morning}
 
Ew. I know. This is why I can never just accept my apartment. Painting is required for peace of mind lol. Thank God its affordable. The appliances are all an old offwhite color too.


{The color in normal light is actually a bit closer to turquoise...}
 
I actually ended up blending my own color, using the darker bottom color and a lighter color I purchased. This was before I decided to just paint the cabinets white though... Still not sure if I will do the lighter or darker. The darker just seems a bit too bright for my taste, and I think would be to overwhelming. And yes, that is a crack in my wall.


{bedroom and kitchen color swatches}
 
For the bedroom I am leaning towards  the middle color on the lower swatch. I have a white fabric headboard, and white curtains, so I think the light pink/peach will go well and add some playfulness too.

Tuesday, August 7, 2012

Window Dilemma


Ok. Future window plan.


I was definitely stumped for a bit regarding this feature in the living room, as there are about 8 inches within the niche above the windows of just wall, that would make trying to frame the windows with a curtain rod look weird.


Solution: Creating a cornice to cover up that area! So easy! Of course this requires shucking out the ol' sewing machine... Ah well. We will just put this project plan aside for later...

I also want to throw in some pillows to create the feeling of a little reading/sitting area. I am going to try to use the relatively deep window sill (14") as extra seating if I want to have a large get-together!(hahaha yeaaaaa)


Monday, July 30, 2012

Living Room Design Plan


Getting closer and closer!!! I finished repainting my living room last night (yes, I said repainted lol, we will get into that later) and I finally feel good about that aspect. I decided to put together this little reference board though to help me visualize what I am going for.

Et Viola!


1.  Target bookshelves, check.

2.  Painted the walls a light grey, and have white furniture accents. Check.

3.  Looking for a pattern like the above for the curtains.

4.  Pillow, check. Need to grab a couple more and the throw as well.

5.  I need just a couple baskets for storage (yarn, ect.) and I really like these...

6.  I don't have a living room light, so I am using just my table lamp right now. I would like to get a floor lamp for the far corner with this style so that I can actually have enough light to knit at night lol.


But that should be pretty much it! What I am using for my side table is actually an old piano bench, and I need to sand and restain it so that it is dark like the bookshelves, and then I want to have a removable cushion for it as well possibly... But thats a project for leisure later on really.  

Wednesday, July 25, 2012

New Vanity Addition

Yet another Pinterest idea turned reality. These are a couple of ways to display jewelry I found, and decided to create my own version.

See, I HAVE been busy lol. Since moving and unpacking and organizing everything, I am trying to get everything done just right the FIRST time, so I won't have all these projects in the back of my head heckling me. They really do heckle me lol.

Pinned ImagePinned Image


I actually love the tree idea (I would do more of an all white version) but I ended up going with the more conservative version instead. Its just more classic and goes with my room in its entirety.

I just purchased an empty frame from Hobby Lobby, painted it white (they didn't have the dimensions I needed in white), and that was it! Yet another easy storage solution!


I discovered I have a theme going; apparently I love pearls lol.


Thank goodness for costume jewelry! I am glad my personal tastes haven't changed over the past few years and I have been able to maximize the value of my purchases. Its not something you think about when you are young, but as I have gotten older I have spent more time trying to focus on purchases that I know I will love and use over many years, rather than buying something I will only value temporarily. Such an important Style Rule!

Its never stylish to waste money lol.


Monday, July 23, 2012

Thrift Store Finds: Spice Rack turned Nail Polish Rack

Yay! Another fun project completed!


Found this spice rack at CCA for $3.... I love a good deal lol.  

Spattered some paint on it, nailed it up, et viola! I think its absolutely perfect for my new vanity area. And it was so easy! In my new apartment I don't have a seperate vanity area, so coming up with creative storage solutions for all my girly things so that my actual bathroom is crisp and clean for guests, is definitely something I am working on.


I got the idea from Pinterest of course, so I can't take all the credit. But at least the execution was all me :P


I just need one more though, to cover the overflow of nail polish still left on my vanity, and it will be perfect! Def a fun way to display my favorite nail colors hehe!


Monday, July 9, 2012

Moving, Again.

So this is the third apartment I have made my home since I started this blog.

Wow.

Well, at least I can say that with each move my rent has been less and less expensive lol. I think I hit the bottom of the barrel with this one though, so definitely not moving again until I either get into medical school or choose another career move.

I lucked out pretty well with this one. Although the exterior leaves more than something to be desired *le sigh* the interior has a lot of potential, and the floor plan is perfect for my furniture and lifestyle.

The other apartments I toured in my price range had teeny tiny kitchens, I'm not even sure I would qualify them as kitchens lol, while this one actually has a relatively good sized one.

AND a window!
Quelle surprise!

You have no idea how significant that is until you have to live in a dungeonesque apartment with only one source of light.

Before I put everything up on the walls and such I have to paint, so will be working on that this month. Then I will actually be able to completely unpack and put things up on the bookshelves and such. Yay!

OMG the closet. Oh the closet. Its literally 6' x 9'. Craziness. This is very good though because while I have nowhere near enough clothes to actually utilize half that space, I can store all my holiday decorations and random crap here without any problem. Of course I could use this as an excuse to beef up my wardrobe.... lol. Oh like I need an excuse. Hahaha oh I crack myself up.

This is the exact floorplan.


The flow is really great! It just feels very comfortable.

Ok so the actual move... was a disaster. Not going to get into all the depressing horror, but needless to say it was to most stressful move ever. And to top it all off, I broke my TV. Sadness! That has been with me for seven years, and it finally keeled over. Have to move that up to the top of the "To Purchase" list now dang it all, but it was time to get a new one anyway. The timing could have been a liiittle more convenient though, not gonna lie.

I made a list though of all the random crap I need. A lot of it is like, storage and organizational stuff. Boring, but functional.

Then a few decor items! Curtains for the living room windows, couch pillows, and a throw or two. I have to pick a new color scheme for the living space, and while I definitely have settled on a light grey for the walls, I still have to decide on the few pops of accent color I want.... so many choices!

This next month will be busy for sure, but not gonna stress about any of it. I have done this enough times lol.


Tuesday, May 22, 2012

New Apartment


I'm moving to a new place! At first I was looking for a little studio apartment, but the price difference between that and a one bedroom was just so insignificant, I sprung for the latter again. I'm taking this change as an opportunity to change up my color scheme, and I have fallen in love with GREY.


I have several white furniture pieces, as well as a few dark espresso wood bookshelves. I think the addition of some baskets would be a good way to introduce some texture as well as soften the dark woods. I think Garden Ridge has a great supply so I may check them out...

I need to pick my accent pop of color though! Hmmmm.


I really love the wall of art with all the white frames. Its sort of an extension of the simplified version I did over my bed. And it would be a great place to feature some of my sketches in my home! OOooOOo. I'm excited.

Also, now I won't have my own sink and vanity area seperate from the bathroom, so I need a vanity! I have always thought they were so cute, so hopefully I can find something a bit like this...


or this...


I really love the idea of all the hooks here as well! This way you don't have to put so many holes in the wall lol.

And speaking of vanities, I definitely want to come up with a way to hang my necklaces. Right now I just have them hanging from nails in the wall itself, but I love the idea of using a frame! I don't think any girl would NOT want to display her jewelry.